Behind the Scenes: Professional Tips for Drywall Installation and Repair
Mastering the Art of Flawless Walls: Expert Insights into Drywall Repair & Installation
Drywall serves as the canvas for the interior of most buildings, providing a smooth surface for painting or wallpapering. However, its installation and repair are often underestimated arts that require precision, patience, and the right techniques to achieve seamless results. This comprehensive guide dives into professional tips for both drywall installation and repair, ensuring your walls are flawlessly finished every time.
Understanding Drywall
Drywall, also known as gypsum board, wallboard, or plasterboard, is a panel made of calcium sulfate dihydrate (gypsum) sandwiched between two thick sheets of paper. It's preferred for its quick installation and relatively low cost, making it a ubiquitous choice for constructing interior walls and ceilings.
The Essentials of Drywall Installation
Choosing the Right Drywall: Select the appropriate thickness; typically, ½ inch for walls and ⅝ inch for ceilings. Moisture-resistant drywall is ideal for bathrooms and basements.
Measuring and Cutting:
Measure the space accurately. Use a utility knife to score the drywall paper and snap it along the line. For precision cuts, a drywall saw or a rotary tool is used for outlets and switches.
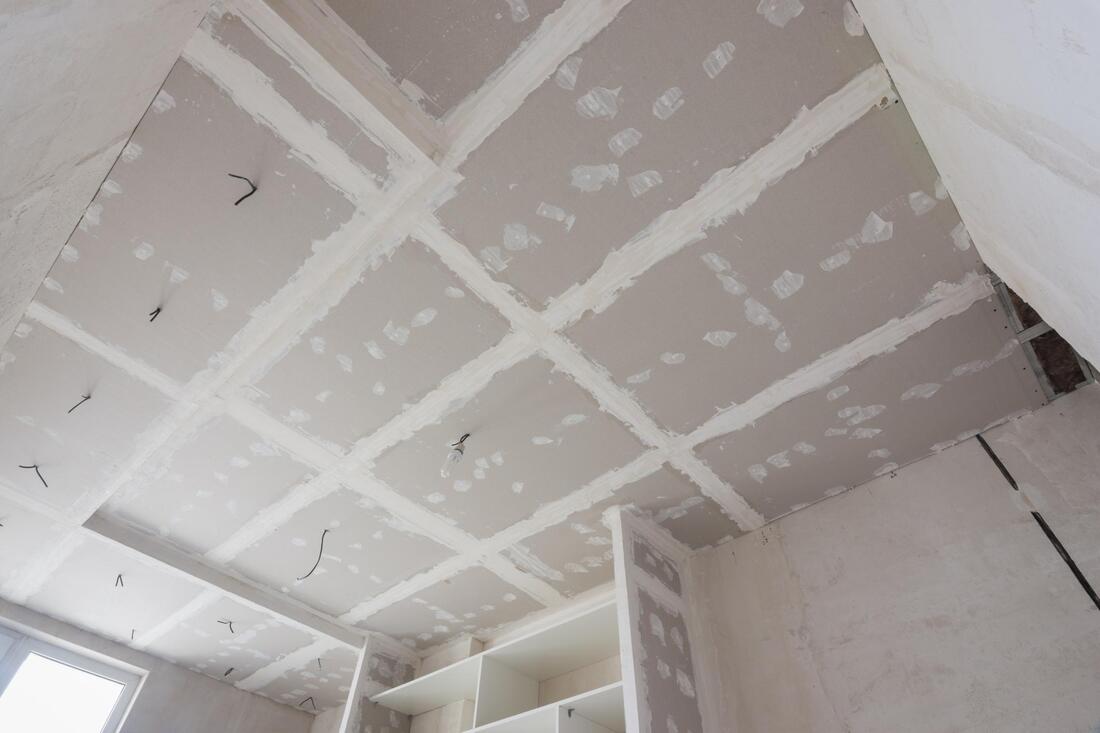
Hanging Drywall:
Start from the ceiling and work your way down to the walls. Use drywall screws and a drill to secure the panels to the studs, ensuring screws are slightly below the surface but not tearing the paper.
Taping and Mudding:
Apply joint compound (mud) over seams, corners, and screw indentations. Place drywall tape over the seams, then apply another layer of mud. Sand between coats for a smooth finish.
Sanding and Priming: Once the mud is dry, sand the surface to a smooth finish. Dust off and apply a primer suitable for drywall to prepare the surface for painting or wallpapering.
Professional Tips for Seamless Installation
Stagger the Seams: Avoid aligning the ends of drywall panels across the entire wall or ceiling to prevent cracking.
Leave a Gap: A small gap at the bottom of the wall panels allows for floor expansion and prevents moisture wicking.
Use the Right Tools: A drywall T-square and a good quality utility knife can significantly improve accuracy and speed.
Control Dust: Sanding drywall can produce a lot of dust. Use sanding sponges or a vacuum sander to minimize airborne particles.
The Craft of Drywall Repair
Drywall repair is an essential skill for fixing holes, cracks, and water damage, ensuring the longevity and aesthetics of your walls.
Small Holes: For pencil-sized holes, apply spackling paste, let it dry, then sand smooth.
Medium Holes: Use a self-adhesive mesh patch. Apply it over the hole, then cover with joint compound, sand, and finish.
Large Holes: Cut a piece of drywall to fit the hole, secure it with a backing support (like a wooden board), apply joint compound, place drywall tape around the edges, and finish with sanding.
Expert Repair Tips
Match Textures: If your walls are textured, use a sponge, brush, or specialized tool to mimic the pattern when the mud is almost dry.
Feather the Edges: When applying joint compound, feather the edges to blend the repair into the existing wall seamlessly.
Use Lightweight Compound: For faster drying and easier sanding, opt for a lightweight joint compound.
Preventing Common Mistakes
Over Sanding: This can damage the paper face of the drywall. Sand lightly and use a sanding block to avoid gouging.
Skipping Primer: Primer seals the repaired area and ensures a uniform surface for painting.
Ignoring Manufacturer Guidelines: Always follow the instructions for mixing and applying joint compounds or any drywall product.
Conclusion
Drywall installation and repair are foundational skills in the construction and maintenance of modern buildings. By following these professional tips and techniques, you can achieve durable and aesthetically pleasing walls. Remember, the key to success lies in preparation, patience, and attention to detail. Whether you're hanging new drywall or patching up a small hole, these insights will help you master the art of drywall work, ensuring your projects are completed to the highest standard.